Facebook Twitter Google+ Image Map

Saturday, March 3, 2012

Emerson LCD, Black Friday, Black Screen - DIY Fix

I dislike Walmart. I dislike shopping (unless it's online). I hate Black Friday. I really hate shopping at
Walmart on Black Friday. Despite all of these things, I got talked into going to Walmart on Black Friday in 2010. Until a recent mishap, I was actually glad I did it. I purchased a 42" Emerson 1080p LCD HDTV for next to nothing and was quite happy with it.

AND THEN...
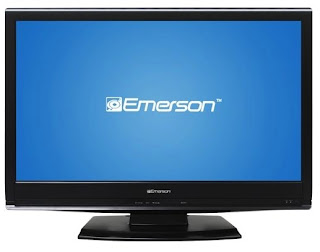
Just after the warranty expired, like magic, the TV started having problems. BIG PROBLEMS. Well, they started small but grew like weeds. It all started in the middle of Dora The Explorer. I went to turn the volume down with the remote and there was no response. I assumed it was the batteries, so naturally, I left my seat and pushed the power button on my Emerson TV. No response. What did I do? I unplugged the damn thing, plugged it back in and pushed power. The blue light came on at the bottom left of the TV. That was it. It still wouldn't turn on. I temporarily gave up.

A few hours later, I decided to do what most people do when they can't figure something out. www.google.com. Lo and behold, I see hundreds of people with the same problem. I see hundreds of people that are disgusted with Emerson and Walmart. I see hundreds of people that seem to be SOL and reverting back to their old tube TV's. I don't see any answers.

For a while I contemplated making a video pretending to play Wii bowling and launching my WiiMote into an already broken TV. I figured I could at least get some YouTube hits out of this. Fortunately, I refrained.

Now, being a computer guy, this idea popped into my head. For computers, I consider it one of the oldest tricks in the book. It's typically the computer world's equivalent to raising Lazarus from the dead. Folks, behold the power drain! I'm not going to get into the science of it but I will tell you how it's done.

Here's how you do it:

1. Unplug the TV from the outlet
2. Hold the power button down for at least 1 minute.
3. Plug the TV back in.
4. Push the power button.

After I did this, to my surprise, the TV came on like normal. I cheered wildly and knocked on some wood. Now, the next day it happened again. So I drained the power again, thinking this was going to become the standard power on procedure. Well, that was the last time I had to do it. It's been almost 3 weeks now and the TV is working perfectly! Maybe what I did didn't actually fix it. Maybe it's just some giant coincidence. I don't care. It works, and I didn't spend a dime.

If this helps just one person, I'll be thrilled. Try it out and let me know how it goes!

Sunday, February 19, 2012

Get Your Cloud On: Part 2, Microsoft Sky Drive

When I first heard about this service, I was blown away. 25GB of online storage for FREE. Wait, what? Seriously? Yes, seriously. How do I do it? Well, I'll tell you.

1. Head over to https://skydrive.live.com
2. Create a Live account if you don't already have one
3. Login to your live account

Creating a Folder


Click 'Files'
test


Click 'New folder'


Type a name for your new folder and press enter


Adding Files

Select the folder you would like to add files to


Click 'Add files' or just drag and drop files and skip the next step


Find and select the files you want to add and click 'Open'
Hold 'ctrl' (Windows) or 'cmd' (Mac) while clicking to select multiple files at once


Your files should now appear in your folder!


Sharing Folder(s)


Click 'Share folder'


 Enter the email address of the person you want to share the files with
If you don't want them to make changes to the folder, deselect 'Recipients can edit'


If you receive the following message, click the link


Fill out the 'captcha' and click 'Continue'


Go back to the SkyDrive page and click 'Share'


There is one thing that really bothers me about SkyDrive. It doesn't support the uploading of folders. It only supports adding individual files. However, there is a workaround that will allow you to upload a folder and all of it's contents. I will show you how it's done in a later post.

If you have any questions, feel free to post below. I'll be more than happy to help you!

Sunday, January 22, 2012

Get Your Cloud On: Part 1, Google Music


cloud com·put·ing

Noun:
The practice of using a network of remote servers hosted on the Internet to store, manage, and process data, rather than a local server or a personal computer


Let's store our music in the cloud!

Google Music allows you to upload up to 20,000 songs and access them from anywhere that you have an internet connection. Yes, you can even access it from your mobile device. Best of all, it's FREE!

Quick Steps

  1. Sign up for a Gmail account.
  2. Download and install Music Manager.
  3. Choose the location where your music files are stored.
  4. Upload your music.
  5. Access Google Music from any computer by going to music.google.com.
  6. Access Google Music from your mobile device by going to music.google.com or get the Android app.
  7. Disable Music Manager on computer start up by going to the advanced tab (optional)
Below, you will see in depth instructions on how to complete the above steps. This tutorial was created in Windows 7, but should translate easily to other operating systems.


Installing Music Manager

1. If you haven't already, Sign up for a Gmail account.
2. Go to Google Music.
3. Click Agree.


4. Click the "Download Music Manager" link.


5. Browse to your downloads folder and run the "musicmanagerinstaller.exe" program.


6. Click the "Next" button.


7. Enter your Gmail address and password then click the "Next" button.
note: you can uncheck "Automatically send crash reports to Google" if you wish. I'll leave it checked to help improve the software.


8. Select the location of your music collection. Mine is in the "My Music" folder.
9. Click the "Next" button.


10. Music Manager will now scan your music folder. Once finished click the "Next" button.


11. I don't want Music Manager to automatically upload my music, so I selected the "No" button. This is personal preference.


12. You should now have the Music Manager icon in your system tray. Click the "Next" button.


13. Your Music is now uploading. Depending on how many files you have, this could take a while. Click the "Go to Google Music" button.


Using Google Music from a Computer

1. If you didn't click the "Go to Google Music" button in the above step, just type music.google.com into your web browser. 

2. Bookmark this page.


3. By now a few songs have probably been uploaded. Click on the "Albums" link and then click an album.


 4. Double click on a song to start playing it.


5. Click the small arrow to access details of the current track or album.


Access Google Music From Your iPhone (or other smart device)
note: Android has an app specifically for Google Music. For other devices you have to access it through your web browser. 

1. On your mobile device go to music.google.com.


2. Sign in with your Gmail username and password.


3. Bookmark the page.
4. Stream your music!


Disable Music Manager on Startup (optional)

1. Open Music Manager (in windows just double click the tray icon).


2. Click the "Advanced" tab.


3. Uncheck the "Start automatically when computer is started" box.


4. Click the "OK" button.


Wednesday, January 11, 2012

Using FDM to schedule download times

There are a lot of Internet Service Providers out there that limit the amount of data you can download each month. Most of the time these ISP's will give you a certain time window where you have unlimited downloads. The only problem is this time window is normally during your sleeping hours. How convenient...

You could wake up in the middle of the night and download that new hit song from iTunes or that new game you've been dying to play. Alternatively, you could use Free Download Manager and sleep soundly knowing your download will be waiting for you when you wake up. You choose option B?

Setting up the software

1. Click here to download the program.

2. Install the software making sure "Launch FDM automatically at Windows startup" is checked.


3. Open the newly installed program

4. Click Options > Settings > Downloads > Time Limit

5. Check "Limit time when FDM can start downloads"

6. Set your start and stop times and click the "Ok" button. FDM will only download between these hours.


Starting Downloads


Method 1


1. You should now have a blue download box at the bottom right of your screen anytime you open a web browser.


2 .To add a file to your download list, just drag and drop the download link onto the blue square.


3. Click "Ok" in the FDM dialog box. Your download will start at the scheduled time.

Method 2


1. Right click the download link.

2. Open FDM by double clicking the blue download box.


3. Click the "Add download" button.


4. Right click in the "URL" field and paste the link.

5. Click the "Ok" button. Your download will start at the scheduled time.

Friday, January 6, 2012

Create a Secure Password Using LeetSpeak

Let's face it, it's 2012 and cyber criminals are lurking in every shadow of the internet. These people want nothing more than to steal your personal information. How do they do it? They use programs to guess your lackluster password for a site that you frequent. To top it off, studies show that at least 33% of computer users use the same login information over multiple websites. This means if a hacker steals your Facebook password he's going to try it on other sites. Emails, bank accounts, insurance, oh my!

Scared yet? Of course you're not. This could happen to everyone else, just not you. Um... no. Read on!

Leet

Leet (or "1337")  is an alternate version of the English alphabet. Leet uses symbols and numbers to replace letters.

1 = L
3 = E
3 = E
7 = T

Make sense? M@k3 53N53? Take a look at the image below.


Why Leet?

To guess passwords, a lot of hackers use what's called a dictionary attack. In short, a program runs through an exhaustive list of common words and tests them all for a match. This type of attack has a very high success rate on passwords that use single words or variations of words found in a dictionary, such as adding a number.

To sum it all up

Bad Passwords: Password12, Secure86, Random72
Great Passwords: P@55w0rd12, 53cur386, R@nd0m72
Elite Passwords: 9@55vv02cl12, 53(y3w386, 9@/\/cl04472

Here's to being secure in 2012! I'm going to go change my password now.


Friday, December 23, 2011

A Life Saver: Google Chrome Session Manager

I'm sorry Firefox, but I'm doing most of my browsing in Google Chrome now. It's lightweight and just plain fast. Yes, I still use Firefox too, but we'll save that for a later post.

 If you're like me, you browse with tabs, and at times have several windows open with several tabs in each window. Call me crazy, but I try to keep tabs categorized in their own windows. Entertainment in one window, social sites in another. You get the idea. Sometimes, I'll leave a set of tabs open for days, because it contains information on current research. Unfortunately, it can be a hassle to wade through this mess of windows and tabs.

Introducing: Chrome Session Manager. This is one of the best discoveries I've had in a while. Session Manager allows you to save sessions of tabs and windows that can be reopened and viewed at a later time. Now, I can actually close that bloated window and reopen it (with just a few clicks) when I'm feeling up to it.

Here are the two sessions I have at the moment:
  1. Social - This opens Gmail, Facebook, Twitter, etc.
  2. Research - This opens tabs dealing with software that I'm currently researching.

Here's How:

If you don't have Google Chrome, install it by clicking here.

  • Click here to go to the Session Manager download page.
  • Click "+ ADD TO CHROME."
  • Go through the installation process.
  • Once installed, the Session Manager icon will appear on your toolbar.


  • Click the Session Manager Icon.
  • Enter a name for you new session and click save. This will save all of your current windows and tabs as a new session.

  • To open a saved session, just click the Session Manager icon, and then click "Open" next to the session you would like to restore.

Thursday, December 22, 2011

The Importance of Keeping Your Computer Cool

Imagine this scenario. You're working in the sweltering heat, desperately trying to finish a few miscellaneous jobs. It's hot. You're getting overheated. Unless you're super-human, you probably can't get as much accomplished in the heat. You perform much better at moderate temperatures. Am I right?

A computer is a lot like you in this instance! No! Do not give it water! A computer needs to stay cool in order to work at peak performance and live a long and prosperous life.

This applies to laptops and desktops. However, laptops are a lot more susceptible to soaring temperatures. All of the parts are crammed into a small place, which makes it harder to circulate air and maintain low temperatures. If your laptop is burning your leg right now, suck it up and read on.

Things you can do

  • Take it off of your lap: "But it's called a laptop." I don't care! Move it! Having the computer on your lap makes for bad airflow. Instead use a lap desk. I use one and it makes a huge difference.

  • Clean the air vents: Just like anything else in your house, computers collect dust. Turn your computer off and unplug it. Look for any air vents and hit them with some compressed air. While your at it, get those nasty crumbs out of the keyboard! 


  • Room to breathe: Make sure your desktop computer isn't stuffed in some forgotten nook or used as a table for junk. Remember, air circulation is crucial! 
  • Check your fans: Most computer manufacturers have fan diagnostic software. Take a look at your manufactures website, and see if this software is available for your machine. This will allow you to test the fans without taking the computer apart.


  • Purchase a cooling pad: Give your laptop an extra burst of cool! Most cooling pads are USB powered so they don't have a drastic affect on your portability.  


Drastic Measures


The above solutions aren't working for you? Try these. 


  • Have it cleaned: Turn your computer over to a professional, and let them take it apart and clean the insides.
  • Replace the cooling components: Again, you'll want someone who knows what they are doing. Tell your local tech guru that your computer is running hot. Have them check the fans, heat sink, etc., and let them replace the parts that aren't working properly.