Facebook Twitter Google+ Image Map

Friday, December 23, 2011

A Life Saver: Google Chrome Session Manager

I'm sorry Firefox, but I'm doing most of my browsing in Google Chrome now. It's lightweight and just plain fast. Yes, I still use Firefox too, but we'll save that for a later post.

 If you're like me, you browse with tabs, and at times have several windows open with several tabs in each window. Call me crazy, but I try to keep tabs categorized in their own windows. Entertainment in one window, social sites in another. You get the idea. Sometimes, I'll leave a set of tabs open for days, because it contains information on current research. Unfortunately, it can be a hassle to wade through this mess of windows and tabs.

Introducing: Chrome Session Manager. This is one of the best discoveries I've had in a while. Session Manager allows you to save sessions of tabs and windows that can be reopened and viewed at a later time. Now, I can actually close that bloated window and reopen it (with just a few clicks) when I'm feeling up to it.

Here are the two sessions I have at the moment:
  1. Social - This opens Gmail, Facebook, Twitter, etc.
  2. Research - This opens tabs dealing with software that I'm currently researching.

Here's How:

If you don't have Google Chrome, install it by clicking here.

  • Click here to go to the Session Manager download page.
  • Click "+ ADD TO CHROME."
  • Go through the installation process.
  • Once installed, the Session Manager icon will appear on your toolbar.


  • Click the Session Manager Icon.
  • Enter a name for you new session and click save. This will save all of your current windows and tabs as a new session.

  • To open a saved session, just click the Session Manager icon, and then click "Open" next to the session you would like to restore.

Thursday, December 22, 2011

The Importance of Keeping Your Computer Cool

Imagine this scenario. You're working in the sweltering heat, desperately trying to finish a few miscellaneous jobs. It's hot. You're getting overheated. Unless you're super-human, you probably can't get as much accomplished in the heat. You perform much better at moderate temperatures. Am I right?

A computer is a lot like you in this instance! No! Do not give it water! A computer needs to stay cool in order to work at peak performance and live a long and prosperous life.

This applies to laptops and desktops. However, laptops are a lot more susceptible to soaring temperatures. All of the parts are crammed into a small place, which makes it harder to circulate air and maintain low temperatures. If your laptop is burning your leg right now, suck it up and read on.

Things you can do

  • Take it off of your lap: "But it's called a laptop." I don't care! Move it! Having the computer on your lap makes for bad airflow. Instead use a lap desk. I use one and it makes a huge difference.

  • Clean the air vents: Just like anything else in your house, computers collect dust. Turn your computer off and unplug it. Look for any air vents and hit them with some compressed air. While your at it, get those nasty crumbs out of the keyboard! 


  • Room to breathe: Make sure your desktop computer isn't stuffed in some forgotten nook or used as a table for junk. Remember, air circulation is crucial! 
  • Check your fans: Most computer manufacturers have fan diagnostic software. Take a look at your manufactures website, and see if this software is available for your machine. This will allow you to test the fans without taking the computer apart.


  • Purchase a cooling pad: Give your laptop an extra burst of cool! Most cooling pads are USB powered so they don't have a drastic affect on your portability.  


Drastic Measures


The above solutions aren't working for you? Try these. 


  • Have it cleaned: Turn your computer over to a professional, and let them take it apart and clean the insides.
  • Replace the cooling components: Again, you'll want someone who knows what they are doing. Tell your local tech guru that your computer is running hot. Have them check the fans, heat sink, etc., and let them replace the parts that aren't working properly.

Thursday, December 15, 2011

Increase productivity with keyboard shortcuts: Windows

Let's face it, keyboard shortcuts have been around for a long time, yet so many people shy away from using them. More often than not, I get the "hey, how did you do that?" response when I hop on a client's computer and execute a series of commands without even touching the mouse.

Keyboard shortcuts are only for advanced users right? Wrong! With just a little bit of practice you will be whizzing around your computer in no time. Here's a quick list of shortcuts I use frequently. Don't be intimidated if the list seems long. The shortcuts will become second nature before you know it.

Difficulty: Easy


Document Manipulation
"Ctrl + C" - Copy selected
"Ctrl + X" - Cut selected
"Ctrl + V" - Paste previously copied or cut item
"Ctrl + S" - Save document
"Ctrl + P" Print
"Ctrl + Z" - Undo
"Page Up" - Insert cursor at top of document 
"Page Down" - Insert cursor at bottom of document
"Home" - Insert cursor at the beginning of the current line
"End" - Insert cursor at the end of the current line
"Shift + Page Up" - Select all text before the cursor"
"Shift + Page Down" - Select all text after the cursor
"Backspace" - Delete text to the left of the cursor
"Delete" - Delete text to the right of the cursor
"Shift + End" - Select all text on the current line to the right of the cursor
"Shit + Home" - Select all text on the current line to the left of the cursor
"Shift + Up, Down, Left, or Right" - Select text in the direction you choose

File/Folder Manipulation
"F2" - Rename selected file/folder
"Delete" - Delete selected file/folder
"Shift + Delete" - Delete skipping the recycle bin
"Ctrl + Shift + N" - Create new folder

Bonus: When trying to navigate to a single file or folder among several, click on any file and type the first few letters of the file you're looking for. I use this all of the time. See the example below.

We're looking for a folder named RockIT.  We know it's in here but so are a lot of other folders. 

Step 1: Click on any folder in the window.


Step 2: Quickly type the first few letters of the folder/file you're looking for. In this case I typed "roc" and it brought me to the "RockIT" folder. Voila! 


Web Browsing 
"Ctrl + T" - Open new tab
"Ctrl + W" - Close current tab
"Ctrl + N" - Open new browser window
"Ctrl + Tab" - Go to next tab
"Ctrl + Shift + Tab" - Go to previous tab
"Ctrl + Shift + N" - New window
"Page Up" - Scroll up the page
"Page Down" - Scroll down the page


Windows Navigation 
"Alt + Esc" - Minimize current window
"Alt + F4" - Close current window

"Alt + Tab" - Cycle to next window or cycle back and forth between two windows
"Alt + Shift + Tab" - Cycle to previous window
"Win + D" - Go to desktop
"Win + E" - Open windows explorer


Again, this is just a list of my most frequently used keyboard shortcuts. There are still many many more to explore. Good luck and have fun!

Monday, December 12, 2011

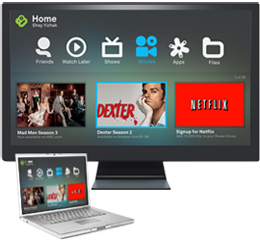
Using Your Old Computer for the Ultimate Media Experience

Before:I had a laptop sitting around collecting dust. As far as I'm concerned, all machines should pull their own weight. Don't you agree? I desperately needed to give this old HP something to do! What you ask? I turned it into a media box for my TV.

After:Now the computer stays plugged into my TV. I can use it to play DVD's, CD's, Pandora, Netflix and pretty much anything else you can think of. To top it off, I control it all with my iPhone!

Difficulty: Moderate

Photobucket

What I used:

HP DV2700 laptop with 3GB of RAM, Windows Vista, and VGA output
WiFi connection
iPhone 3GS
Emerson 42" LCD TV with VGA input (model LTDN42V68US)
VGA Cable
5.1 Surround Sound Speaker System
1/8" to RCA audio cable
Boxee Software (FREE)
Boxee iPhone App (FREE)
Targus Cooling Pad

You can use:

Mac, PC,  or Ubuntu Linux with at least 512MB of RAM
iPhone
VGA, S-Video, or HDMI cable
TV with VGA, S-video, or HDMI input
Speakers
Audio cable (unless you're using HDMI)
Internet connection
Boxee Software (FREE)
Boxee iPhone App (FREE)

Here's how:

Installing the software on your computer:

Step 1:Turn on computer and connect to the internet.

Step 2:Click here to go to the Boxee download page.

Step 3:Select your operating system. I chose "Windows PC."

Step 4:Fill out the signup form and click "Go on."

Step 5:Click "Download Boxee for (OS)."

Step 6:Navigate to the location of your Boxee download and click it to start the install.

Step 7:Click your way through the installation process.

Step 8:Open Boxee on your computer.

Setting up the hardware:

Step 1:Connect a VGA, S-Video, or HDMI cable from your computer to your TV.

Step 2: (If using HDMI skip this step)
Connect a cable from your speaker/tv input to the 1/8" headphone output jack on your laptop. You might need a special cable to do this.

Step 3:Switch your TV to VGA mode.

Installing the software on your iPhone:

Photobucket

Step 1:Go to the App Store and search for "boxee remote."

Step 2:Install boxee remote.

Step 3:Open boxee remote and click "Search for hosts." You should now be able to control Boxee on your computer by using your iPhone!

 Congratulations you're finished!